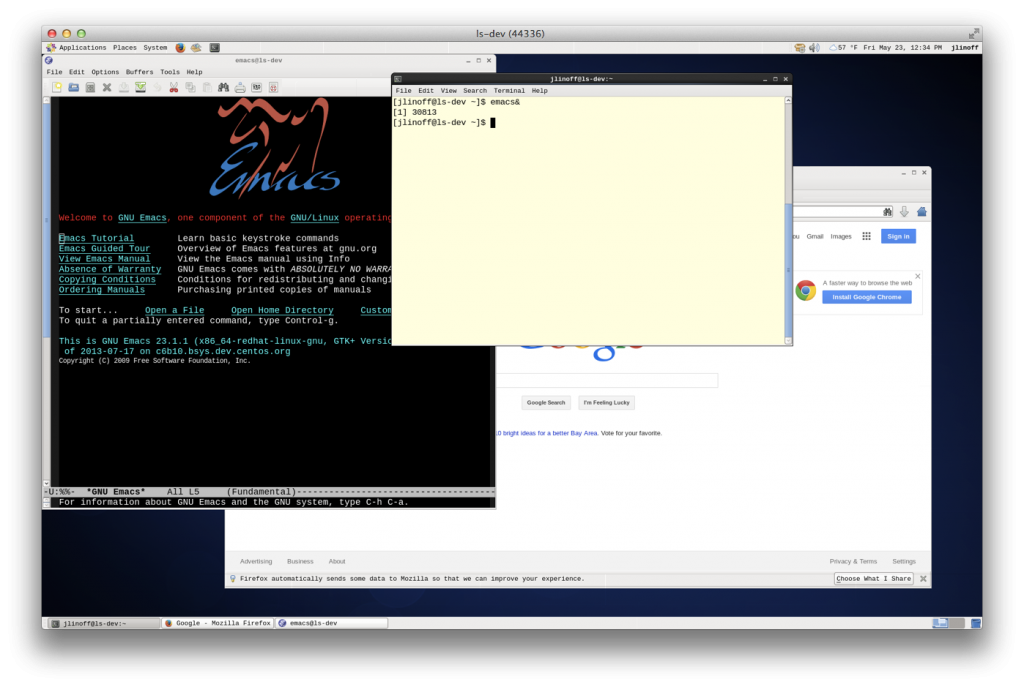
This blog describes how I set up a CentOS 6.5 VPS dev host for RDP access using “Microsoft Remote Desktop” from my Mac.
I have a virtual private server (VPS) that was setup as a vanilla server but I wanted to use it for development which means, among other things, that I wanted to access it remotely using a windowing environment. I also wanted to make it easy for my Windows based colleagues to access it which was the motivation for using the remote desktop protocol (RDP).
Remember, this is only for remote development hosts. Do not do this for production or testing servers because it expands the potential attack surface.
These are the basic configuration steps for installing XRDP on the remote server:
- Create one or more users (you do not want to login remotely as root for security).
- Install the base necessary packages.
- Install the EPEL repository and EPEL packages.
- Configure the VNC resolution in /etc/sysconfig/vncservers.
- Configure ~/.vnc/xstartup.
- Configure the services.
- Add additional packages if desired.
- Add additional fonts if desired.
Once it has been configured you access it from your local host as follows.
- Setup up an SSH tunnel from a local socket to the remote server 3389 socket.
- Run an RDP client.
Both configuration and access are described in more detail below.
Configuration
These are the commands that I used to configure it. The output has been snipped to save space. You will see that the example below shows root logging in remotely contrary to my earlier comment. That was done to simplify the steps. In practice you would probably create a sudo user and disable root logins.
|
1 2 3 4 5 6 7 8 9 10 11 12 13 14 15 16 17 18 19 20 21 22 23 24 25 26 27 28 29 30 31 32 33 34 35 36 37 38 39 40 41 42 43 44 45 46 47 48 49 50 51 52 53 54 55 56 57 58 59 60 61 62 63 64 |
$ # Step 1. Login and create a user $ ssh root@1.2.3.4 $ useradd rdpuser $ passwd rdpuser # set a password for rdpuser $ # Step 2. Install the necessary packages $ # You probably only need Desktop and "X Window System" $ yum groupinstall -y 'Desktop Platform Development' 'X Window System' 'Desktop' $ yum install –y wget pciutils mlocate $ yum update $ updatedb # update the locate db $ init 6 # reboot $ # Step 3. Login again (after the reboot) $ ssh root@1.2.3.4 $ # Step 4. Install the EPEL repository. $ wget http://download.fedoraproject.org/pub/epel/6/x86_64/epel-release-6-8.noarch.rpm $ rpm -ivh epel-release-6-8.noarch.rpm $ yum repolist # confirm that the repo was installed $ # Step 5. Install the EPEL packages. $ yum install xrdp tigervnc-server $ # Step 6. Set the VNC/RDP resolution. $ cat >>/etc/sysconfig/vncservers <<EOF VNCSERVERS[2]="2:rdpuser" VNCSERVERARGS[2]="-geometry 1280x1024 -nolisten tcp -localhost" EOF $ # Step 7. Create the local .vnc/xstartup file. $ # This needs to be done for each user. $ su - rdpuser # do this for rdpuser $ mkdir ~/.vnc $ cat >~/.vnc/xstartup <<EOF #!/bin/sh # Uncomment the following two lines for normal desktop: unset SESSION_MANAGER exec /etc/X11/xinit/xinitrc [ -x /etc/vnc/xstartup ] && exec /etc/vnc/xstartup [ -r $HOME/.Xresources ] && xrdb $HOME/.Xresources startx & EOF $ exit $ # Step 8. Configure the services $ # First configure the iptables to allow traffic on port 3389 so that clipboard $ # operations work. $ # CITATION: http://ajmatson.net/wordpress/2014/01/install-xrdp-remote-desktop-to-centos-6-5 $ iptables -I INPUT -p tcp -m state --state NEW -m tcp --dport 3389 -j ACCEPT $ service iptables save $ service iptables restart $ # Now start the services. $ service vncserver start $ service xrdp start $ chkconfig xrdp on $ chkconfig vncserver on $ # Step 9. Install some useful packages $ yum install emacs nano vim firefox $ # Finally – added some fonts to make things more readable. |
Access
Once it is configured you can access by setting up an SSH tunnel and then connecting via an RDP client.
Here is how you setup the SSH tunnel.
|
1 2 3 4 5 6 7 8 9 10 |
$ # Create 127.0.0.:12345 tunnel to your server (1.2.3.4). $ # 3389 is the default RDP socket. $ ssh -X -A -t -t \ -C \ -o port=22 \ -o ServerAliveInterval=300 \ -o ServerAliveCountMax=3 \ -o TcpKeepAlive=no \ -L 12345:127.0.0.1:3389 \ rdpuser@1.2.3.4 |
Once the tunnel is running you can access via your RDP client using 127.0.0.1:12345. Here is what it looks like from my Mac using “Microsoft Remote Desktop”.
Enjoy!
