The mkwebsite package allows you to install multiple completely self contained production quality websites on a single server for development and debugging without root privileges. I have used it for web development on linux and Mac OS X. The sites generated can also be used in production.
I developed it because I wanted to be able to completely remove my development sites without leaving any system wide packages around that I didn’t need and because I wanted to compare security settings side by side for sites that were otherwise identical.
It is very easy to use, simply download the package, extract it and run the associated install script for each website that you want to create. It takes care of all the system administration details (like database and server configuration) so that you can concentrate on development.
Each website contains a web server (nginx), a database (postgres), a web framework (django), a web server gateway interface (uwsgi) to connect the framework to the server, caching using memcache and a host of client side tools for web development such as jquery, jquery-ui, cryptojs, tooltipters, bootstrap, datatables, dynatree and flot.
In addition each website has HTTP and HTTPS infrastructure with self signed certificates to get you started. Because HTTP and HTTPS ports (80, 443) are on privileged ports by default, the installation process will choose non-privileged ports for those services. Like almost all aspects of the package, these are fully customizable during installation.
And finally media and static files are handled by the server in the the django directory tree as the media and static sub-directories, respectively. You can, of course, customize the server to serve them from other hosts if you wish.
This package mkwebsite system incorporates the following open source packages and would not be possible without them. Please give them your support.
| Package | Version | Type | URL |
|---|---|---|---|
| bootstrap | 3.0.3 | client | http://getbootstrap.com/ |
| cryptojs | 3.1.2 | client | http://code.google.com/p/crypto-js/ |
| datatables | 1.9.4 | client | http://datatables.net/ |
| django | 1.6.2 | server | https://www.djangoproject.com/ |
| dynatree | 1.2.5 | client | http://code.google.com/p/dynatree/ |
| flot | 0.8.2 | client | http://www.flotcharts.org/ |
| jquery | 2.0.3 | client | http://jquery.com/ |
| jquery-ui | 1.10.3 | client | http://jqueryui.com/ |
| libevent | 2.0.21 | server | http://libevent.org/ |
| memcached | 1.4.17 | server | http://memcached.org/ |
| nginx | 1.4.4 | server | http://nginx.org/en/ |
| pcre | 8.34 | server | http://www.pcre.org/ |
| postgresql | 9.3.2 | server | http://www.postgresql.org/ |
| tooltipster | n/a | client | http://iamceege.github.io/tooltipster/ |
| uwsgi | 1.2.6 | server | https://uwsgi-docs.readthedocs.org/en/latest/ |
The mkwebsite package is available as tar or zip files from the following links.
| TYPE | CHECKSUM | INSTALLATION |
|---|---|---|
| tar.bz2 | 20780 | $ wget http://projects.joelinoff.com/mkwebsite/mkwebsite.tar.bz2 |
| tar.gz | 62790 | $ wget http://projects.joelinoff.com/mkwebsite/mkwebsite.tar.gz |
| zip | 13983 | $ wget http://projects.joelinoff.com/mkwebsite/mkwebsite.zip |
The table above shows how to run the install script for each different download type. As you can see, the package will be extracted to a local directory. At the time of this writing the version is 0.16 so the local install directory will be mkwebsite-0.16. The version number will change when new versions are released but the basic structure will be the same.
EXAMPLE: Download and Install
The example below shows how to install the tool.
Joes-MacBook-Air:webdev jlinoff$ # Installation Example
Joes-MacBook-Air:webdev jlinoff$ mkdir ~/webdev
Joes-MacBook-Air:webdev jlinoff$ cd ~/webdev
Joes-MacBook-Air:webdev jlinoff$ wget http://projects.joelinoff.com/mkwebsite/mkwebsite.tar.bz2
--2014-02-22 12:47:13--  http://projects.joelinoff.com/mkwebsite/mkwebsite.tar.bz2
Resolving projects.joelinoff.com (projects.joelinoff.com)... 205.134.253.188
Connecting to projects.joelinoff.com (projects.joelinoff.com)|205.134.253.188|:80... connected.
HTTP request sent, awaiting response... 200 OK
Length: 28299258 (27M) [application/x-tar]
Saving to: ‘mkwebsite.tar.bz2’

100%[===========================================================>] 28,299,258  1.01MB/s   in 28s

2014-02-22 12:47:42 (986 KB/s) - ‘mkwebsite.tar.bz2’ saved [28299258/28299258]

Joes-MacBook-Air:webdev jlinoff$ tar jxf mkwebsite.tar.bz2
Joes-MacBook-Air:webdev jlinoff$ ls -l
total 55272
drwxr-xr-x  8 jlinoff  staff       272 Feb 22 11:56 mkwebsite-0.16/
-rw-r--r--  1 jlinoff  staff  28299258 Feb 22 12:12 mkwebsite.tar.bz2
Joes-MacBook-Air:webdev jlinoff$
EXAMPLE: Create a Website
Once the tool has been downloaded and extracted you can create a website by running the install.sh script in the mkwebsite-<version> directory.
Before starting this process you will want to choose a site name and an app name. I typically use a company name (like acme_inc) or a group name (like data_mining) for the site and the app name (inventory). The app name is really not that important because you easily add new apps in Django using the startapp command.
If you plan to install multiple websites, make sure that you use different ports for HTTP, HTTPS and the database to avoid creating hard to debug errors. Unfortunately this cannot be automated because the installations are local for easy removal and because other sites may not be running at the time of the install so the port use cannot be detected.
You will see that I used the “-p” switch to force the install script to prompt for each option. I did that because the install script remembers all of your previous entries so that you can re-use them. You always want to use this option if you are planning to install multiple sites. If you are only planning to install one then it doesn’t matter.
This example shows the long, interactive form. You can also run the whole thing using command line options and no prompts.
NOTE: You will not be able to install a web site if you do not have a development environment available that contains make, gcc, python and other tools used to build the infrastructure. Once the site is built you can migrate it to another server that does not contain those tools.
Joes-MacBook-Air:webdev jlinoff$ # Create website example: Acme Inc.
Joes-MacBook-Air:webdev jlinoff$ cd ~/webdev
Joes-MacBook-Air:webdev jlinoff$ ./mkwebsite-0.16/install.sh -p
# ****************************************************************
# This is the installer for mkwebsite-0.16.
#
# Would you like to see the help before proceeding?
#
# Please enter yes or no.
Help <yes>?

USAGE
  install.sh [OPTIONS]

DESCRIPTION
  This script will install a web site in a completely self contained
  directory tree on this host that does not require administration
  privileges to run. It also creates a customized script that you
  can use later for other installations.

  You can remove this installation at any time by simply stopping the
  site using the <site>/rtf/bin/sitemgr.py tool.

  There are number of command line options available. They are
  described below. If you do not specify them then you will be
  prompted for them with defaults.

OPTIONS
  -a <name>, -app <name>   The app name.
                           The default is "myapp".

  -c <file>, --cfg <file>  The cfg file. This is where the install
                           options are read from and save to.
                           The default is install.cfg.

  --db-port <port>         The database port to use.
                           The default is 9082.

  -h, --help               This help message.

  --http-port <port>       The HTTP port to use.
                           The default is 9080.

  --https-port <port>      The HTTPS port to use.
                           The default is 9081.

  -p, --prompt             Force all prompts.
                           This is useful when a configuration
                           file is present.

  --ports <HTTP> <HTTPS> <DB>
                           Specify all of the ports at once separated
                           by commas in order HTTP, HTTPS, DB.

  -r <dir>, --root <dir>   The root directory for the site.
                           The default is the current directory.

  -s <name>, --site <name> The site name. The full path to the
                           site will be: <root>/<site>.
                           The default is "mywebsite".

  --start                  Start the site automatically after
                           installation.

  -v, --verbose            Increase the level of verbosity.

EXAMPLES
  1. Run with prompts:
     $ ./mkwebsite-0.16/install.sh

  2. Dry run with prompts:
     $ ./mkwebsite-0.16/install.sh -n

  3. Run with the configuration file, force prompts:
     $ # Assumes that a previous run was done.
     $ ./mkwebsite-0.16/install.sh -p

  4. Run with some command line options:
     $ ./mkwebsite-0.16/install.sh --ports 10080 10081 10082 -a introduction

# ****************************************************************
# Please enter the root directory for the installation.
#
# The default is the current directory: /Users/jlinoff/webdev
# All relative paths are relative to it.
Root directory </Users/jlinoff/webdev>?

# ****************************************************************
# Please enter the site name.
#
# This is a subdirectory under the root directory that contains
# this site. With this approach you can have multiple sites in
# the same directory tree, for example:
#
#    /opt/websites/production
#    /opt/websites/development
#
# Where /opt/websites is the root directory with two sites:
# production and development.
Site name <mywebsite>? acme_inc

# ****************************************************************
# Please enter your app name.
#
# This is the name of the initial app name that is set up for you in the
# Django directory structure. You can change it later, you can delete it
# and you can additional apps so the name isn't that important.
App name <myapp>? inventory

# ****************************************************************
# Please enter the HTTP port value.
#
# This is the port that you use to access the website in your
# browser. If you want to use port 80 you will have to either
# install the website as root (bad idea for security reasons)
# or update your firewall to forward traffic between port 80
# and this port.
HTTP port <9080>?

# ****************************************************************
# Please enter the HTTPS port value.
#
# This is the port that you use to access the website in your
# browser. If you want to use port 443 you will have to either
# install the website as root (bad idea for security reasons)
# or update your firewall to forward traffic between port 443
# and this port.
HTTPS port <9081>?

# ****************************************************************
# Please enter the database port value.
#
# This is the port that you use to access your database server.
Database port <9082>?

Configuration Options:

    App Name      : "inventory"
    Configuration : "install.cfg"
    Database Port : 9082
    HTTP Port     : 9080
    HTTPS Port    : 9081
    Log File      : "install.log"
    Root Dir      : "/Users/jlinoff/webdev"
    Site Name     : "acme_inc"
    Start         : no
    Website Dir   : "/Users/jlinoff/webdev/acme_inc"
    Verbosity     : 0
    Version       : 0.16


# ****************************************************************
# Are the above configuration options correct?
#
# Please enter yes if they are or no if they are not.
Correct <yes>?
<output snipped>
At this point the configuration is done and the install script calls the mkwebsite.py script which is the tool that does all of the heavy lifting. The full installation usually takes between 10 and 20 minutes depending on your host and internet connection speed.
It generates a lot of output which is captured in a log file in the acme_inc/rtf/log/install.log file. At the end you will see a message that looks something like this that tells you how to manage the web server.
<output snipped>
.
.
2446 static files copied to '/Users/jlinoff/webdev/acme_inc/django/acme_inc/static'.
2014-02-22 13:08:54,191    INFO mkwebsite.py:00143 cmd-end:1684: 4.5 seconds
2014-02-22 13:08:54,191    INFO mkwebsite.py:02808 TODO: install examples
2014-02-22 13:08:54,191    INFO mkwebsite.py:01703 install mgr /Users/jlinoff/webdev/acme_inc/rtf/bin/acme_inc-mgr.py
2014-02-22 13:08:54,192    INFO mkwebsite.py:02811 context final state

Website Bootstrap v0.16

The installation completed on 2014-02-22 13:08:54.193311.

The following 16 packages were installated:

     1 bootstrap-3.0.3-dist.zip
     2 CryptoJS%20v3.1.2.zip
     3 DataTables-1.9.4.zip
     4 flot-0.8.2.zip
     5 jquery-2.0.3.js
     6 jquery-2.0.3.min.js
     7 jquery-2.0.3.min.map
     8 jquery-ui-1.10.3.zip
     9 jquery-ui-themes-1.10.3.zip
    10 jquery.dynatree-1.2.5-all.zip
    11 libevent-2.0.21-stable.tar.gz
    12 memcached-1.4.17.tar.gz
    13 nginx-1.4.4.tar.gz
    14 pcre-8.34.tar.bz2
    15 postgresql-9.3.2.tar.bz2
    16 tooltipster-master.zip

You can start the django test server using:

    $ # URL: http://localhost:9080
    $ # URL: http://localhost:9080/inventory
    $ # URL: http://localhost:9080/admin
    $ acme_inc/rtf/bin/acme_inc-mgr.py stop
    $ acme_inc/rtf/bin/acme_inc-mgr.py dbstart
    $ /Users/jlinoff/webdev/acme_inc/venv/bin/activate
    $ cd django
    $ python manage.py runserver 0.0.0.0:9080

Or using uwsgi as follows to verify the stack: web client <--> uswgi <--> django

    $ # URL: http://localhost:9080
    $ # URL: http://localhost:9080/inventory
    $ # URL: http://localhost:9080/admin
    $ acme_inc/rtf/bin/acme_inc-mgr.py stop
    $ acme_inc/rtf/bin/acme_inc-mgr.py dbstart
    $ /Users/jlinoff/webdev/acme_inc/venv/bin/activate
    $ cd django
    $ uwsgi --http :9080 --module website.wsgi

Django admin login:

    Username:  bigbob
    Password:  bigbob

DB admin login:

    $ acme_inc/rtf/bin/acme_inc-mgr.py stop
    $ acme_inc/rtf/bin/acme_inc-mgr.py dbstart
    $ ../acme_inc/rtf/db/bin -U jlinoff acme_inc

Used ports:

    Database   9082
    HTTP       9080
    HTTPS      9081

Here are the control commands that are available.

    $ acme_inc/rtf/bin/acme_inc-mgr.py help           Help.

    $ acme_inc/rtf/bin/acme_inc-mgr.py collectstatic  Collect static files for django.
    $ acme_inc/rtf/bin/acme_inc-mgr.py syncdb         Sync the database for django.

    $ acme_inc/rtf/bin/acme_inc-mgr.py dbstart        Start the DB server.
    $ acme_inc/rtf/bin/acme_inc-mgr.py dbstatus       Status of the DB server.
    $ acme_inc/rtf/bin/acme_inc-mgr.py dbstop         Stop the DB server.

    $ acme_inc/rtf/bin/acme_inc-mgr.py restart        Reload the DB.
    $ acme_inc/rtf/bin/acme_inc-mgr.py reload         Restart the uwsgi, nginx, memcached and DB servers.
    $ acme_inc/rtf/bin/acme_inc-mgr.py start          Start the uwsgi, nginx, memcached and DB servers.
    $ acme_inc/rtf/bin/acme_inc-mgr.py status         Status of the uwsgi, nginx, memcached and DB servers.
    $ acme_inc/rtf/bin/acme_inc-mgr.py stop           Stop the uwsgi, nginx, memcached and DB servers.
    $ acme_inc/rtf/bin/acme_inc-mgr.py test           Test the environment.

To start using your new website follow these steps:

    1. Start the all of the web services: nginx, uwsgi and postgresql
       using the management tool that was generated for your site.

       These services run locally from the website directory and will
       not conflict with system wide services that might be running as
       long as the ports are different.

       $ acme_inc/rtf/bin/acme_inc-mgr.py start

    2. Navigate to the website:

       $ firefox http://localhost:9080
       $ firefox http://localhost:9080/inventory
       $ firefox https://localhost:9081
       $ firefox https://localhost:9081/inventory

       Self signed certificates were automatically created for
       HTTPS:
          CRT: acme_inc/rtf/nginx/conf/acme_inc.crt
          KEY: acme_inc/rtf/nginx/conf/acme_inc.key

    3. The django app is located in acme_inc/django/acme_inc/inventory.
       The templates and static subdirectories are also located in
       that directory. You can cd there to edit the app contents
       including the urls.

    4. The django project manage.py tool is in acme_inc/django/acme_inc.
       To use it you must set your virtualenv like this:

       $ acme_inc/rtf/bin/acme_inc-mgr.py start
       $ .  acme_inc/venv/bin/activate
       $ cd acme_inc/django/acme_inc
       $ python manage.py -h
       $ python manage.py collectstatic --noinput
       $ python manage.py syncdb --noinput
       $ python manage.py startapp mynewapp  # create another app

    5. The django site settings.py and urls.py files are in
       acme_inc/django/acme_inc/acme_inc.

    6. You can access the database using psql like this:

       $ acme_inc/rtf/bin/acme_inc-mgr.py dbstart
       $ ../acme_inc/rtf/db/bin -U jlinoff acme_inc

    7. You can install additional python packages like this:

       $ . acme_inc/venv/bin/activate
       (venv) $ pip install boto twisted
       (venv) $ deactivate

    8. This information is captured in: acme_inc/rtf/log/install.log.

2014-02-22 13:08:54,194    INFO mkwebsite.py:02819 writing install info to acme_inc/rtf/log/install.log
2014-02-22 13:08:54,197    INFO mkwebsite.py:02835 elapsed time 409.7
      410.11 real       252.82 user        93.34 sys
Joes-MacBook-Air:webdev jlinoff$
As you can see, the installer created a custom website manager tool was created called “acme_inc/rtf/bin/acme_inc-mgr.py” that provides a number of commands for managing the server.
There are commands for starting the server, stopping the server, determining the status of the server, for collecting static data for django, for database management and so on. Although each of these can be run independently using tools like psql (for the database) or in your own custom python script, having them in a single manager tool is very convenient.
With all of this in place you can start the webserver as follows:
Joes-MacBook-Air:webdev jlinoff$ ./acme_inc/rtf/bin/acme_inc-mgr.py start
# ================================================================
# start
# ================================================================
start db
  cmd: pg_ctl -D /Users/jlinoff/webdev/acme_inc/rtf/db/dbdata -l /Users/jlinoff/webdev/acme_inc/rtf/log/postgresql.log start
    server starting
  exit_code = 0

start uwsgi
  cmd: uwsgi -d /Users/jlinoff/webdev/acme_inc/rtf/log/uwsgi.log --ini /Users/jlinoff/webdev/acme_inc/django/acme_inc/uwsgi.ini
    [uWSGI] getting INI configuration from /Users/jlinoff/webdev/acme_inc/django/acme_inc/uwsgi.ini
  exit_code = 0

start nginx
  cmd: nginx
  exit_code = 0

start memcached
  cmd: memcached -d -s /Users/jlinoff/webdev/acme_inc/rtf/log/memcached.sock -P /Users/jlinoff/webdev/acme_inc/rtf/log/memcached.pid
  exit_code = 0
You can check the webserver status like this:
Joes-MacBook-Air:webdev jlinoff$ ./acme_inc/rtf/bin/acme_inc-mgr.py status
# ================================================================
# status
# ================================================================
ports
  db     9082 open
  http   9080 open
  https  9081 open

status db
  cmd: pg_ctl -D /Users/jlinoff/webdev/acme_inc/rtf/db/dbdata -l /Users/jlinoff/webdev/acme_inc/rtf/log/postgresql.log status
    pg_ctl: server is running (PID: 54347)
    /Users/jlinoff/webdev/acme_inc/rtf/db/bin/postgres "-D" "/Users/jlinoff/webdev/acme_inc/rtf/db/dbdata"
  exit_code = 0

status uwsgi
  running (pid=54350)

status nginx
  running (pid=54358)

status memcached
  running (pid=54361)
To stop the web server simply use the “stop” command.
Now that that the webserver is running you can access it using your favorite browser at http://localhost:9080 or https://localhost:9081.
Here is a screen shot showing what this site looks like in firefox.
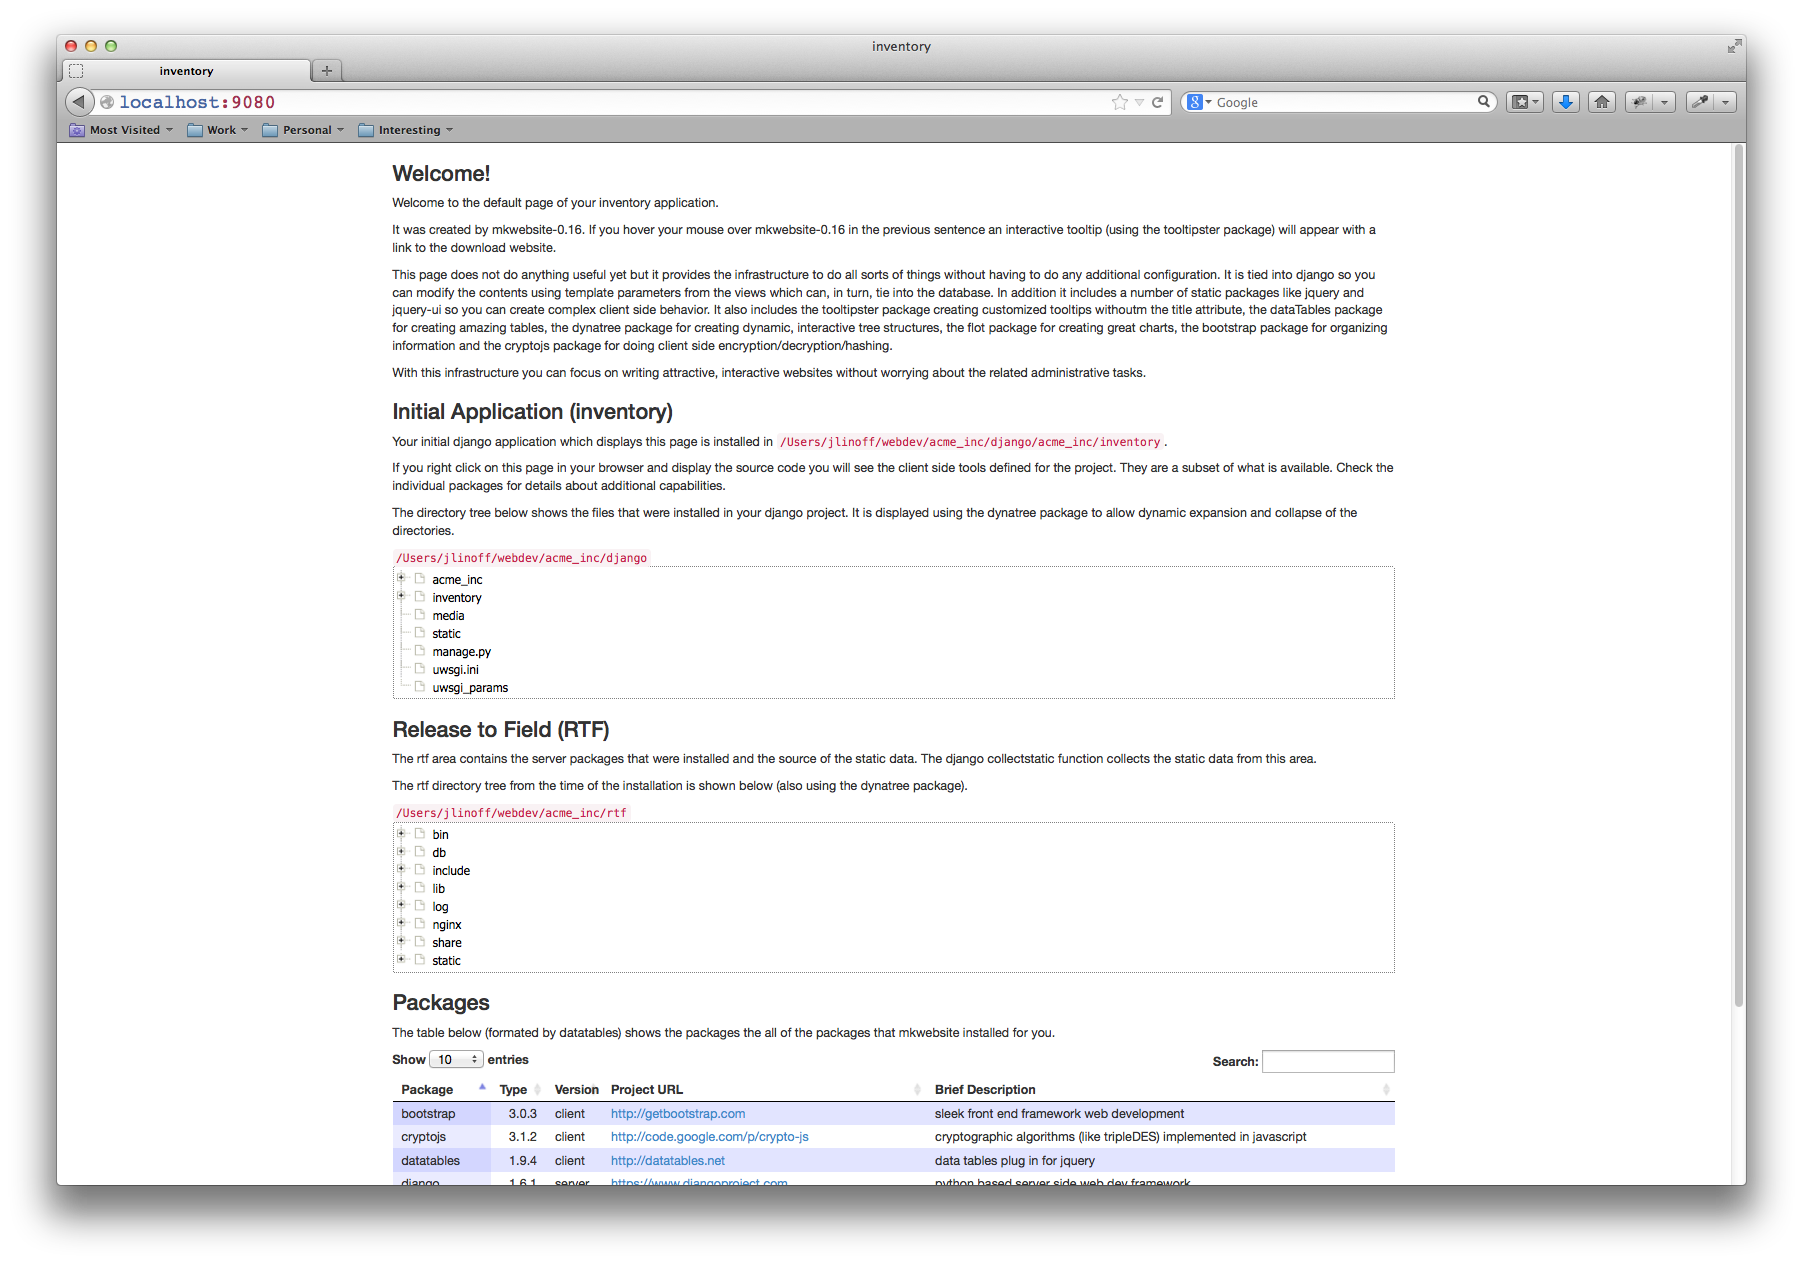
Now you can customize it using python and the django infrastructure.
Delete a Website
Deleting a website is trivial. Simply stop it using the manager in <website>/rtf/bin and then delete the directory tree using rm.
Production Considerations
Because the website is completely self contained, it is easy to copy it around for use in production systems. Just keep the following considerations in mind.
You do not need to install development tools like make or gcc on the production website because you are only using the results of the build/installation.
Directories are hard coded during the installation so the location on the production site must be the same as the location on the development site. I typically use a location like “/opt/website” as the root.
To install on the production site, all you need to do it copy over the entire website directory tree or use the update/get option of a distributed version control system like git. In both cases the src sub directory tree can be ignored.
One final consideration is that you should use the same user on both systems. Although that is not required it makes things simpler.
Directory Structure
The website directory is a combination of the root directory and the website name. For the example above the website directory is “/Users/jlinoff/webdev/acme_inc” where “/Users/jlinoff/webdev” is the root.
Here is a list of interesting sub directories under the website installation directory.
| DIRECTORY | DESCRIPTION |
|---|---|
| django/<website> |
The django directory tree. This is where the django management tools, apps, static and media directories are located. The initial app directory is in django/<website>/<app>.The main website directory is in django/<website>/<website>.The media directory is in django/<website>/media.The static directory is in django/<website>/static.
|
| rtf |
The release to field directory. This is where the production versions of the database (postgres), server (nginx), gateway interface (uwsgi), the logs and the management tools are located. |
| src | The directory tree that contains the source code for the installed packages. |
| venv |
The python virtual environment for the website. You must call <website>/venv/bin/activate before doing any django work.
|
Conclusion
As you can see from this brief introduction, mkwebsite is a powerful tool for helping you develop, maintain and test websites. It also useful for learning how the infrastructure of a website works.
I hope that you find it as useful as I have.
Enjoy!
Thanks !
I tried it, and it worked great. Now that I have the infrastructure in place, all I need is some content !
dt
Excellent! Thank you for trying it.